Migrating my blog to Jekyll

I have been trying to blog for about a year. I initiallly used a self-hosted Wordpress blog, but I recently decided to try something else. I have been looking at Jekyll for some time and finally took the leap to migrate my existing content. Here is how it went and what I think about it so far.
Why…?
First of all, why did I choose to migrate my existing and perfectly working blog to another platform? Well, when I got started I chose the safest path. If you look around online to start a blog, Wordpress is THE most recommended tool. I obviously already heard about it, so it seemed like a good option. I also wanted to get to know this beast. Wordpress has been around for almost 15 years so it was a good opportunity to try it.
Then, I got to work. I followed the setup instructions, created the database, etc. I eventually got my site working. I could finally start to publish content. I quickly realized that I didn’t want to write my posts in pure HTML nor using the fancy preview editor. This is when I discovered Markdown. I was hooked! It was a pretty awesome way to write, focusing on the content and using a lightweight formatting syntax. As a programmer, writing posts in Markdown felt very natural. The publishing workflow was not perfect, I had to copy-paste Markdown text from my desktop editor to the Wordpress publishing tool, but it worked.
Because I was using Markdown in an external editor, it was hard to include images in my posts. I decided to host my images independently of Wordpress and doing so my publishing workflow was getting a bit more cumbersome. I produced a few posts but after some time the dread of having to make many steps to write began to discourage me. I needed a simpler and more streamlined workflow. I decided to take a closer look at Jekyll. The more I was reading about it, the more I loved it. It looked very intuitive from a developer standpoint. I decided to give it a shot and it was all it took to make me want to migrate my blog and motivate me to get back to writing.
The migration
Creating a new Jekyll site is easy and straightforward, a simple command initialize all the files in the folder of your choice. The only hiccup I encountered was with setting up Ruby, because Jekyll runs on Ruby, but StackOverflow gave me working answers quickly. Jekyll seems to be fairly popular and also has great official documentation.
Since I had about 10 posts to migrate, I didn’t bother using the migration tool and I wanted to see how Jekyll works under the hood.
Faster than I thought, my content was migrated to Jekyll and the development server running on my machine. First thing I wanted to do was personalize the visual identity, of course. It was easy to change brand and text colour of the default theme but I wanted more. A bit of Googling once again brought me the answer. It was very easy to modify the appearance of a Jekyll site. You got access to HTML files using the Liquid template engine which allows to easily manipulate your content to build its layout.
Aftermath
After a week of playing around with Jekyll, I must say that I’m already pretty happy of having migrated my content. I prefer the developer-oriented approach of Jekyll and the control I have over the layouts and theme.
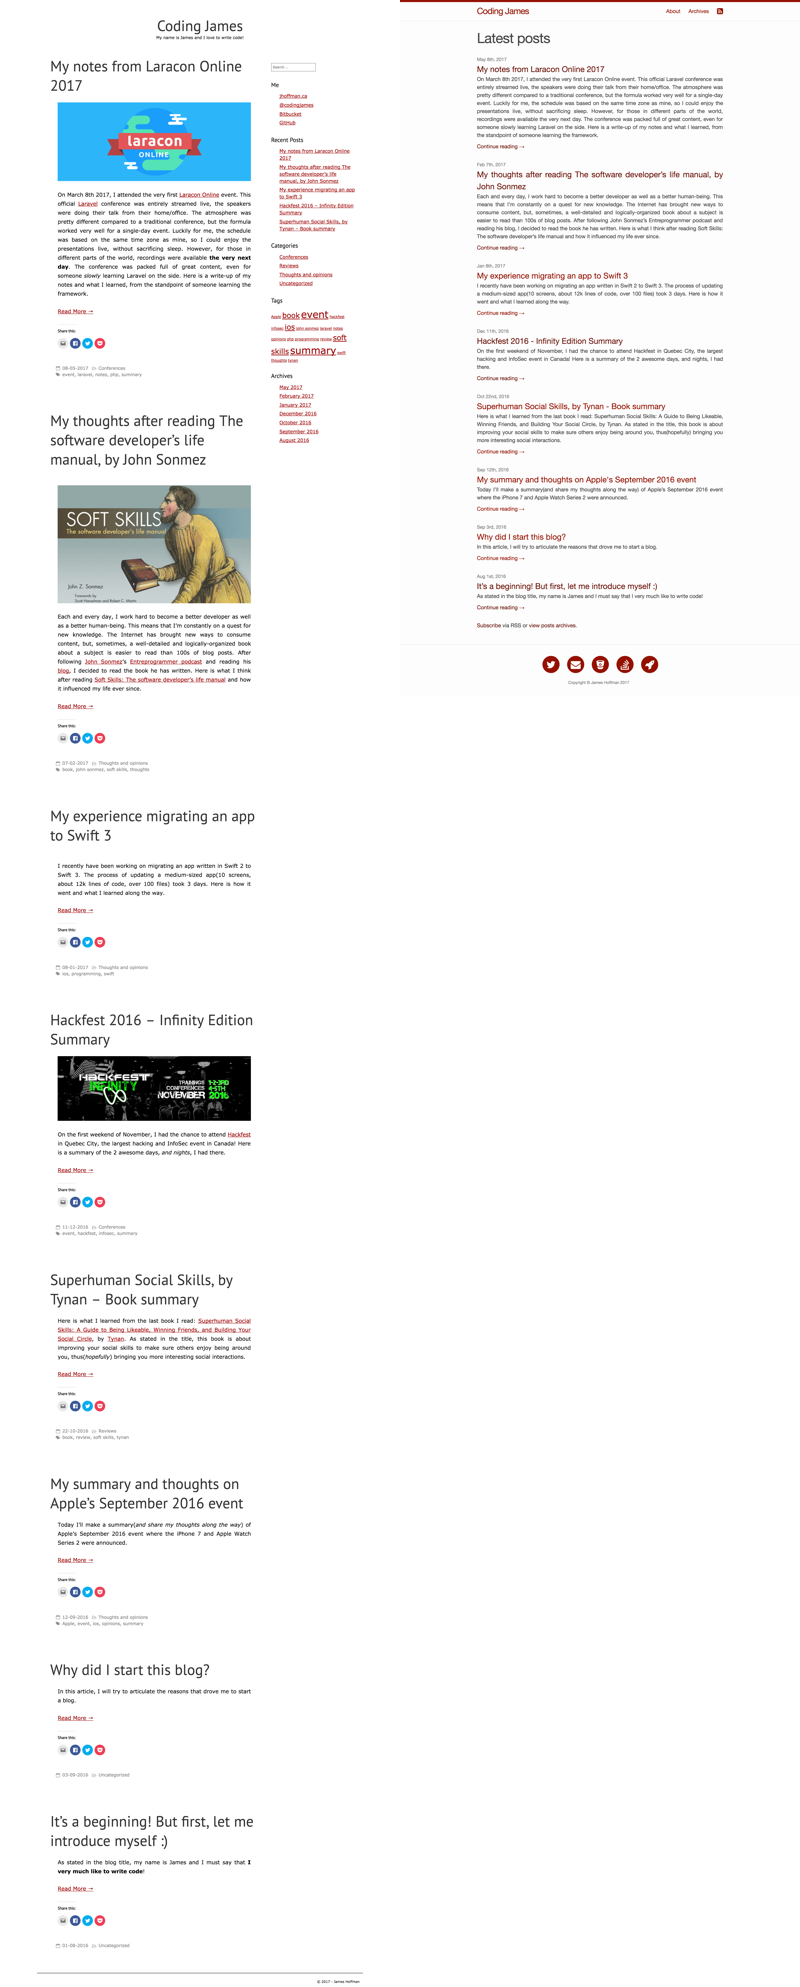
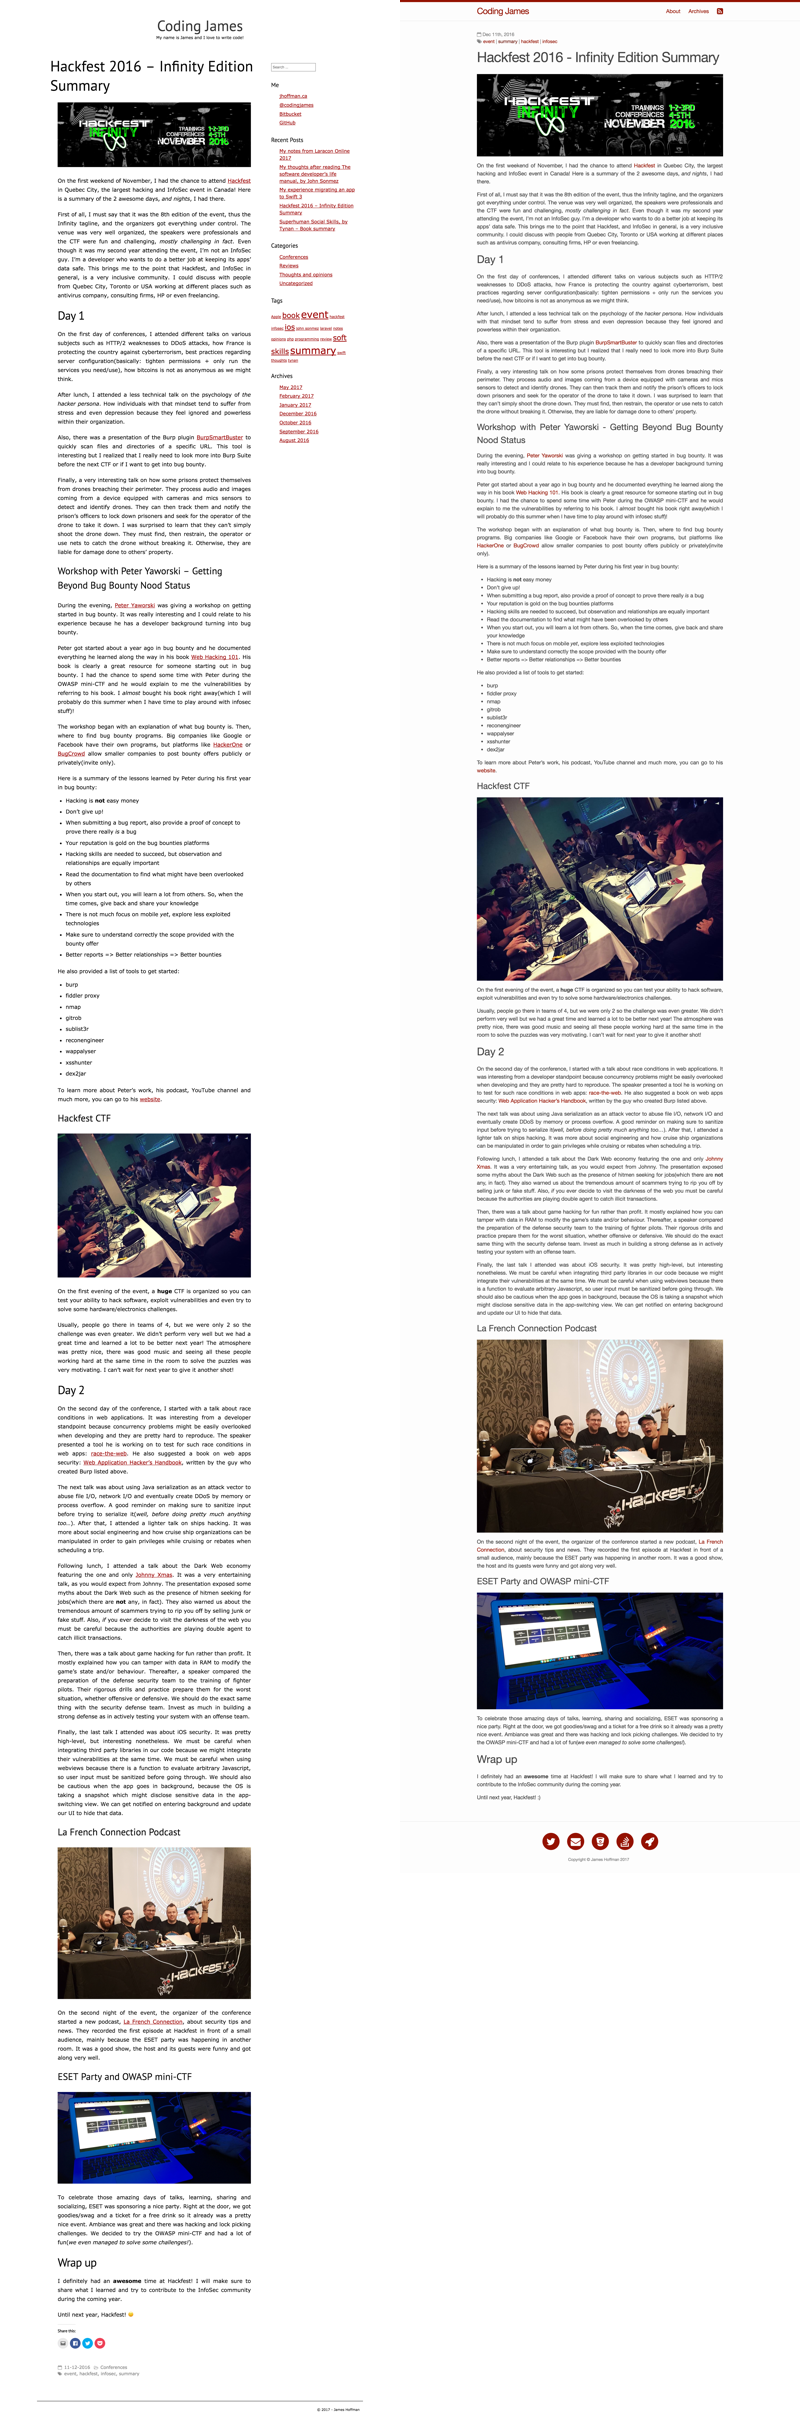
Here is the final result of the migration(original Wordpress site on the left, new Jekyll design on the right).
Home page
Post page
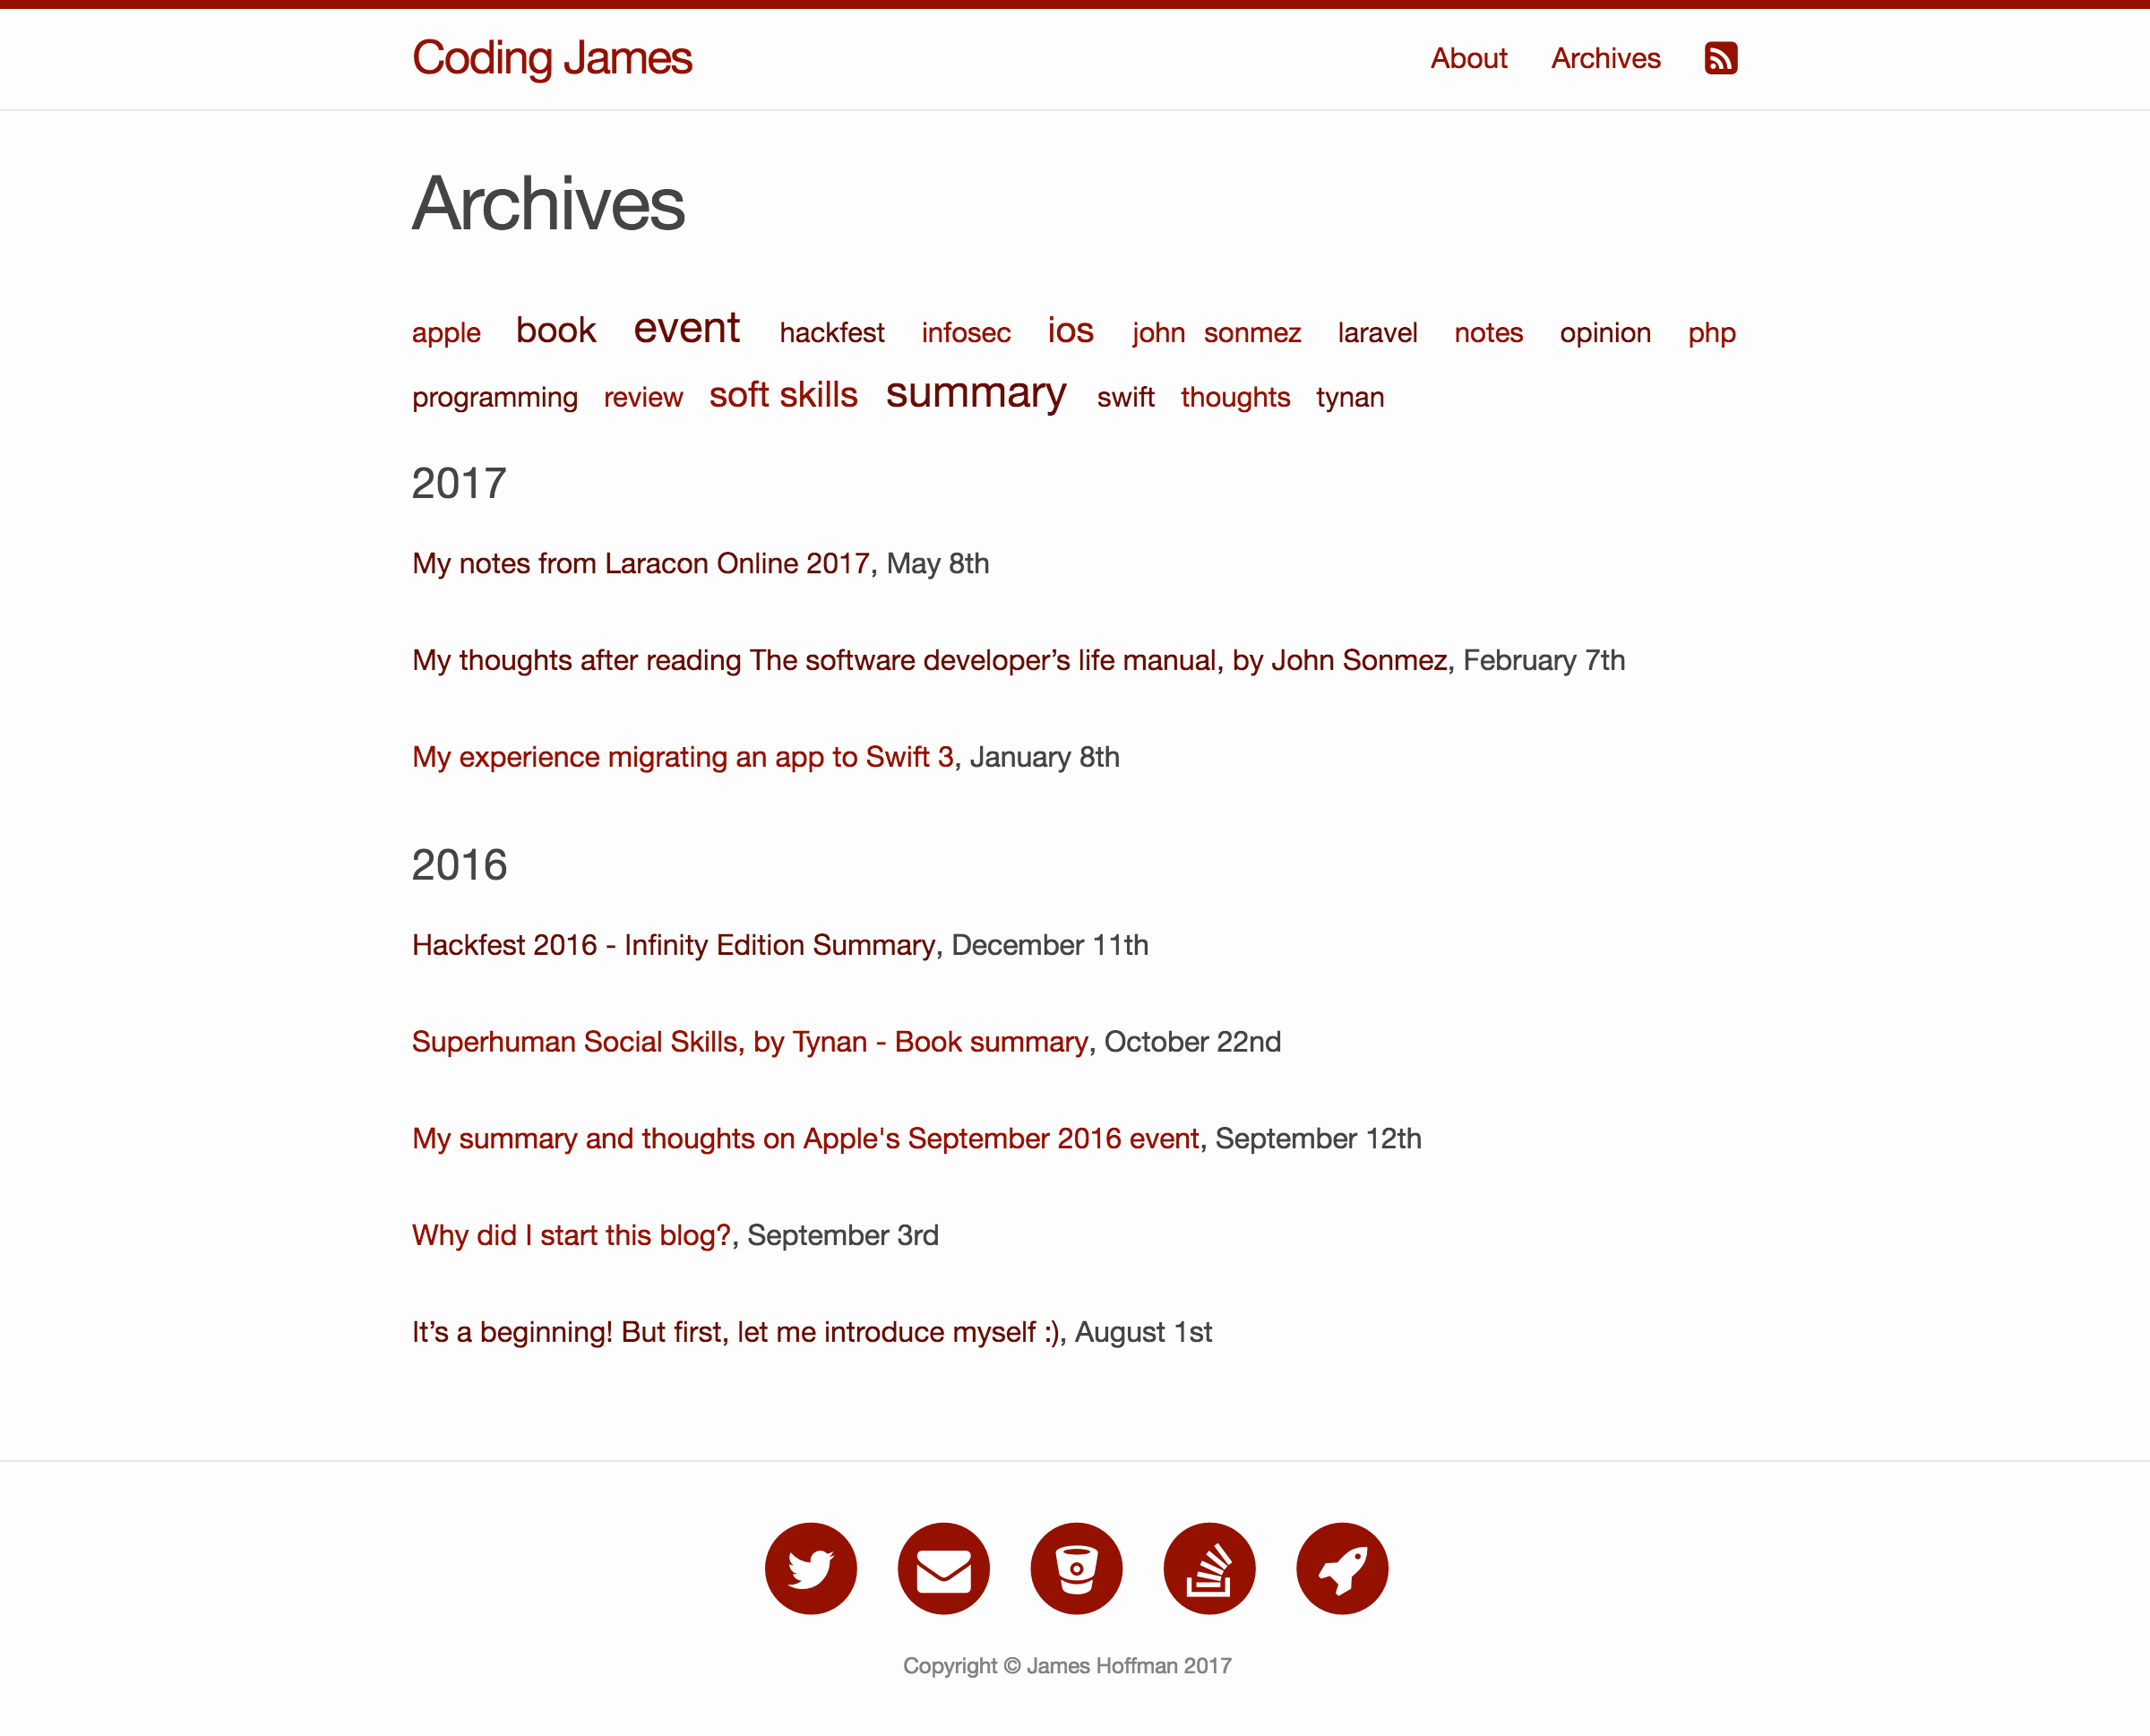
Exclusive to the new Jekyll site, an archives page with all the posts grouped by published year and a tags cloud
I like the new design because it’s simpler and more focused on the content. I also feel more motivated than ever to produce content! :)
Any comments? Hit me up @codingjames